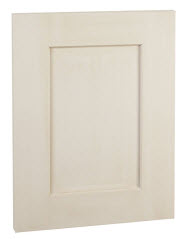
Ivory Top Cabinets
April has brought much anticipated change to our house: the kitchen renovation has finally started! After months of picking out cabinets, tile, hardware, counter tops, a sink, a faucet, and more – all decisions are final! Chris was a real asset cold-calling different home remodel companies to request meetings and quotes and helping me make decisions from SO MANY options. We don’t think this home is our ‘forever’ home so he kept a keen eye on what would add value to the house over what was too unique (or too expensive and could wait). This renovation isn’t just the design for us, though; Chris’ father is coming out for half a week in May to help us (Chris) put together everything from the tile up!
The only labor we are paying for is for tiling the floor. That just seemed like too much to YouTube, so we splurged and found a good deal for someone else to do it. No regrets.

Grey Lower Cabinets
This past weekend, Chris took out all the cabinets, himself, which were built in and into the kitchen. I wish the demo was as easy as unscrewing pre-assembled cabinets from the wall, but it really was dismantling the cabinets and ripping each piece out. Thankfully, it went quicker than anticipated and Chris had our walls bare quickly, without much damage to the dry wall, itself. Unfortunately, our gross (flimsy, off-white, thin, laminate) counter tops had an upper lip to them (no back splash) so we will have to sand down that seam, Spackle, and paint over it. We are not planning to add back splash, so that portion of the wall will be revealed.

Tile
I am gaining a new, functional, personalized kitchen, but I am also losing my bookshelves! Our kitchen came with two waist-high book shelves separating it from the dining room and those are gone after demo day. I filled them up completely, so we have a lot of misplaced books in need of a home. My dream is for built-in shelves on either side of the fireplace, which isn’t unrealistic, but also isn’t happening soon.
For the floor, we are responsible for the demo, so that the tile guy can come in and lay tile right down. This meant ripping up the gross (flimsy, off-white, thin, laminate – it’s a theme) floor as well as 0.25″ plywood underlayment to reveal the subfloor. Chris purchased a long flooring scraper to help, and also relied on a circular saw, crow bar, and log splitting wedge to get pieces up. But, get pieces up he did! The most difficult section was by the back door, which has the basement door and backdoor in a nook. Now our kitchen is cabinet and floor free, save the space around the kitchen sink, which we are leaving in until the day before tiling.

Knobs on the Doors

Handles on the Drawers
I am confident the before and after will be night-and-day, and we’re making a real improvement, but it’s hard not to worry about all the choices we’ve made coming together and looking cohesive. I really don’t want out kitchen to look too new. Our house was built in the 1950’s, and I really love most aspects of it, already. I love that it’s a brick rancher on a huge yard, I love the wall colors and the brick wood-burning fireplace, I love the thin wood flooring and the layout (wish there was a master bath, though). I want our new kitchen to fit in with our house, not outshine all the old character it has. That is my biggest challenge, and I kept things muted (neutral colors, leathered counter tops), and rustic (barnwood shelving with cast iron brackets) in hopes to achieve my dated-but-quality look. I picked an round-edged sink and a simple old-style faucet in hopes of keeping it out of the 21st century, where square industrial sinks and goose-necked faucets are all the rage. I’m terrified the kitchen will look like it doesn’t belong.

Simple Faucet & Spray
I am confident the before and after will be night-and-day, and we’re making a real improvement, but it’s hard not to worry about all the choices we’ve made coming together and looking cohesive. I really don’t want out kitchen to look too new. Our house was built in the 1950’s, and I really love most aspects of it, already. I love that it’s a brick rancher on a huge yard, I love the wall colors and the brick wood-burning fireplace, I love the thin wood flooring and the layout (wish there was a master bath, though). I want our new kitchen to fit in with our house, not outshine all the old character it has. That is my biggest challenge, and I kept things muted (neutral colors, leathered counter tops), and rustic (barnwood shelving with cast iron brackets) in hopes to achieve my dated-but-quality look. I picked an round-edged sink and a simple old-style faucet in hopes of keeping it out of the 21st century, where square industrial sinks and goose-necked faucets are all the rage. I’m terrified the kitchen will look like it doesn’t belong.

Undermount Double Bowl Sink
Despite my concerns, I am ecstatic to be making visible progress and to have our completion date SO CLOSE! We gave ourselves two weekends to demo, and scheduled the tile guy to come next Monday (4/30). Chris’ dad comes in town that Wednesday, and our counter top provider comes in Saturday to measure, then counter top installation is the following Saturday. Somewhere in between there we will be running a water line to the fridge, and figuring out electric for a garbage disposal.
We’ve made a few changes, pre-renovation, just to prepare for the inevitable: We put in recess lighting to brighten up the space, purchased our new appliances ahead of time, and replaced the back door. Those changes have happened slowly over the last two years (whoa, we’ve owned a home for two years!).
I will make a separate post to give you the full-effect of before and afters!
Now, onto the chicken part: We also got two new birdies on Schwall Farms! I wish it was seamless, but they came with some serious lessons.

Eggs (Left to Right) from: Pippin, Morwen, Merry
I picked the two up from the same flock, same coop. One is a grown Ameraucana, about a year old, same as our original three. The second is a little Cream Legbar mix, who is still a pullet and will start laying soon.

Goldberry
The typical introduction of new chickens involves a quarantine period of up to a month or more, where you isolate the new birds from your existing flock. This is to monitor the new birds, to make sure they aren’t bringing diseases to your flock (better to lose one than many), and to do introductions slowly as birds have a pecking order that will need adjustment. This isn’t my first rodeo (OK, OK, it’s my second!), so I did what I had done for Sammie, who was our first new bird. See this post to read about her (spoiler: sad ending). I put the two new girls into a separate run (dog crate) with a little hen house (adapted TV stand) connected. This lets the girl have a home, an outdoor space, and keeps them separated from our existing flock. The newbies came home with me Friday (4/20). I awoke the next morning to check on the birds, let my girls out, and all was well; I went back to sleep. I awoke a second time to Chris banging on our bedroom window an hour later, “one of the new chickens is bloody!” I groggily got up and put warmer clothes on, and came out to find the little Legbar mix missing half her neck. Oh, god! The grown hen had pecked at her neck, removing feathers and skin, pretty severely within the hour that I had checked on them and when Chris had. Now what?!
 Her injury was gruesome and I was overwhelmed with guilt, that I could’ve prevented this pain! Chris was quite worried she would not survive, however having been exposed to more chicken information, communities, and chats, I had seen birds survive worse. We immediately needed to remove the Ameraucana, and treat the little Legbar. Where in the heck was I gunna put this extra bird, though? Oh well, into the yard she goes because the safety of the Legbar is more important than newbie quarantine at this point. Treating the Legbar was a quick facebook/internet search to validate my plan, which was: clean the wound, treat the wound. I made a sterile saline solution to flush the wound and then sprayed it with poultry care spray, specifically for pecking wounds and the like. Your big concern is the bird going into shock from the experience, so I kept checking in on her – she remained alert, eating, and drinking. Whew. Now, she comes in at night so she doesn’t experience cold weather, and her wound gets sprayed 3 times a day with the poultry care stuff. She looks better every day, and is the sweetest, most docile hen. She won’t grow much bigger, so I am already worried about her with hawks.

Morwen
The Ameraucana is a big girl. She’s black with the most beautiful green sheen on her feathers. At first, I was angry with her, and felt quite detached. But, as the day went on, I honestly grew quite fond of her. She’s not too hard to catch, she mostly leaves our original three alone, and figured out the run of things real quick. On her first day with us, she laid an egg. In a nesting box! Not to mention that it was just stunning. The most vivid blue egg I’ve ever seen! She went to the coop really early in the evening, and spent the night without incident (I woke up at 5:30 am to open the run in case waking up together didn’t go well for her). On her second night with us, she slept with the girls on the coop perch, nestled between Merry and Pip, who are the biggest aggressors to new birds!

Look at that green! No filter.
Having gotten to know our new girls a little better, I named them on the second day: Morwen (black Maeraucana) and Goldberry (little Legbar). They’re names from Lord of the Rings. I call them Wennie (like “When-ie”) and Goldie. We learned real quick that Wennie can and will hop our fence. That’s a big no-no as we don’t want to bother the neighbors and it’s more dangerous out in open field (or in the neighbors yard with their dog!). For the first time, we clipped chicken flight feathers. I did one, and was so nervous, I swapped Chris and held Wennie as he cut. No blood, so that means we didn’t cut too much off. We have yet to find out if we cut enough off, though. Hopefully we don’t get another text from our neighbors..
Now it’s a waiting game. Waiting to see how well Wennie integrates into our flock, waiting for Goldie to heal (and trying to figure out when to introduce her to the flock), and then waiting for her to start laying. I haven’t given too much thought about anything past getting Goldie healed again. We can’t introduce her to the hens until she’s completely healed. Unfortunately, chickens are vicious and will attack an injured bird, picking at it’s wound. Yikes. So Goldie needs to be 100% to minimize any risk of her getting pecked again. I need to take some pictures of her now that she’s looking less gruesome, and then post more later when she’s healed and grown.
Chicken keeping is not without its surprises and challenges! Here’s my at-home chicken first-aid kit I’ve assembled to address any chicken maladies (and have used more than I’d like!):
- Vetericyn Plus Poultry Care Spray (wound covering, spraying twice a day)
- Vitamins & electrolytes (boost in extreme heat, help from shock)
- Epsom salt (soaking feet before bumblefoot treatment)
- Vetrap
- Gauze pads
- Disposable gloves
- Baby Aspirin
- Tweezers
- Scissors
- Neosporin ointment (non-pain relieving – NOT a “caine” type (like benzocaine or idocaine))
- Superglue gel (broken beak repair)
- Flashlight
- Styptic powder (bleeding nails/beaks – corn starch works in a pinch)
- Dog nail clippers or dremel
- Chlorhexidine 2% solution (Cleaning and sanitizing bumblefoot & other skin infections, as well as cleaning/sanitizing equipment, work areas, and cages, used for initial cleaning of a wound)
- Apple cider vinegar (worm preventative, many health benefits, 1-3 tablespoons per gallon water)
- VetRX Poultry Aid (relief and prevention of colds, breathing problems – drop on nose, scaly legs)
- Corid (treating Cocci – bloody stool – 1 tsp per gallon water) and I have added..
- Safeguard Goat Wormer 125ml
- Nutri-Drench Poultry, 4 oz.
- Wazine 17 Turkey, Chicken and Swine Wormer, 8 oz.


